
Quickstart Guide
This guide shows the fastest way to create your first working document collection flow and review a submission result.
Introduction
This guide shows the fastest way to create your first working document collection flow and review a submission result.
By the end of this guide, you will have:
- created a collection
- added it to a workflow
- launched the flow
- completed a test submission
- reviewed the result in Submissions
Before you begin
Before you start, make sure you:
- Have a Bynn account Create a Bynn account here
- Can access Document Collection
- have at least one sample file ready for testing
Step 1: Create a collection
Go to Collections and create a new collection.
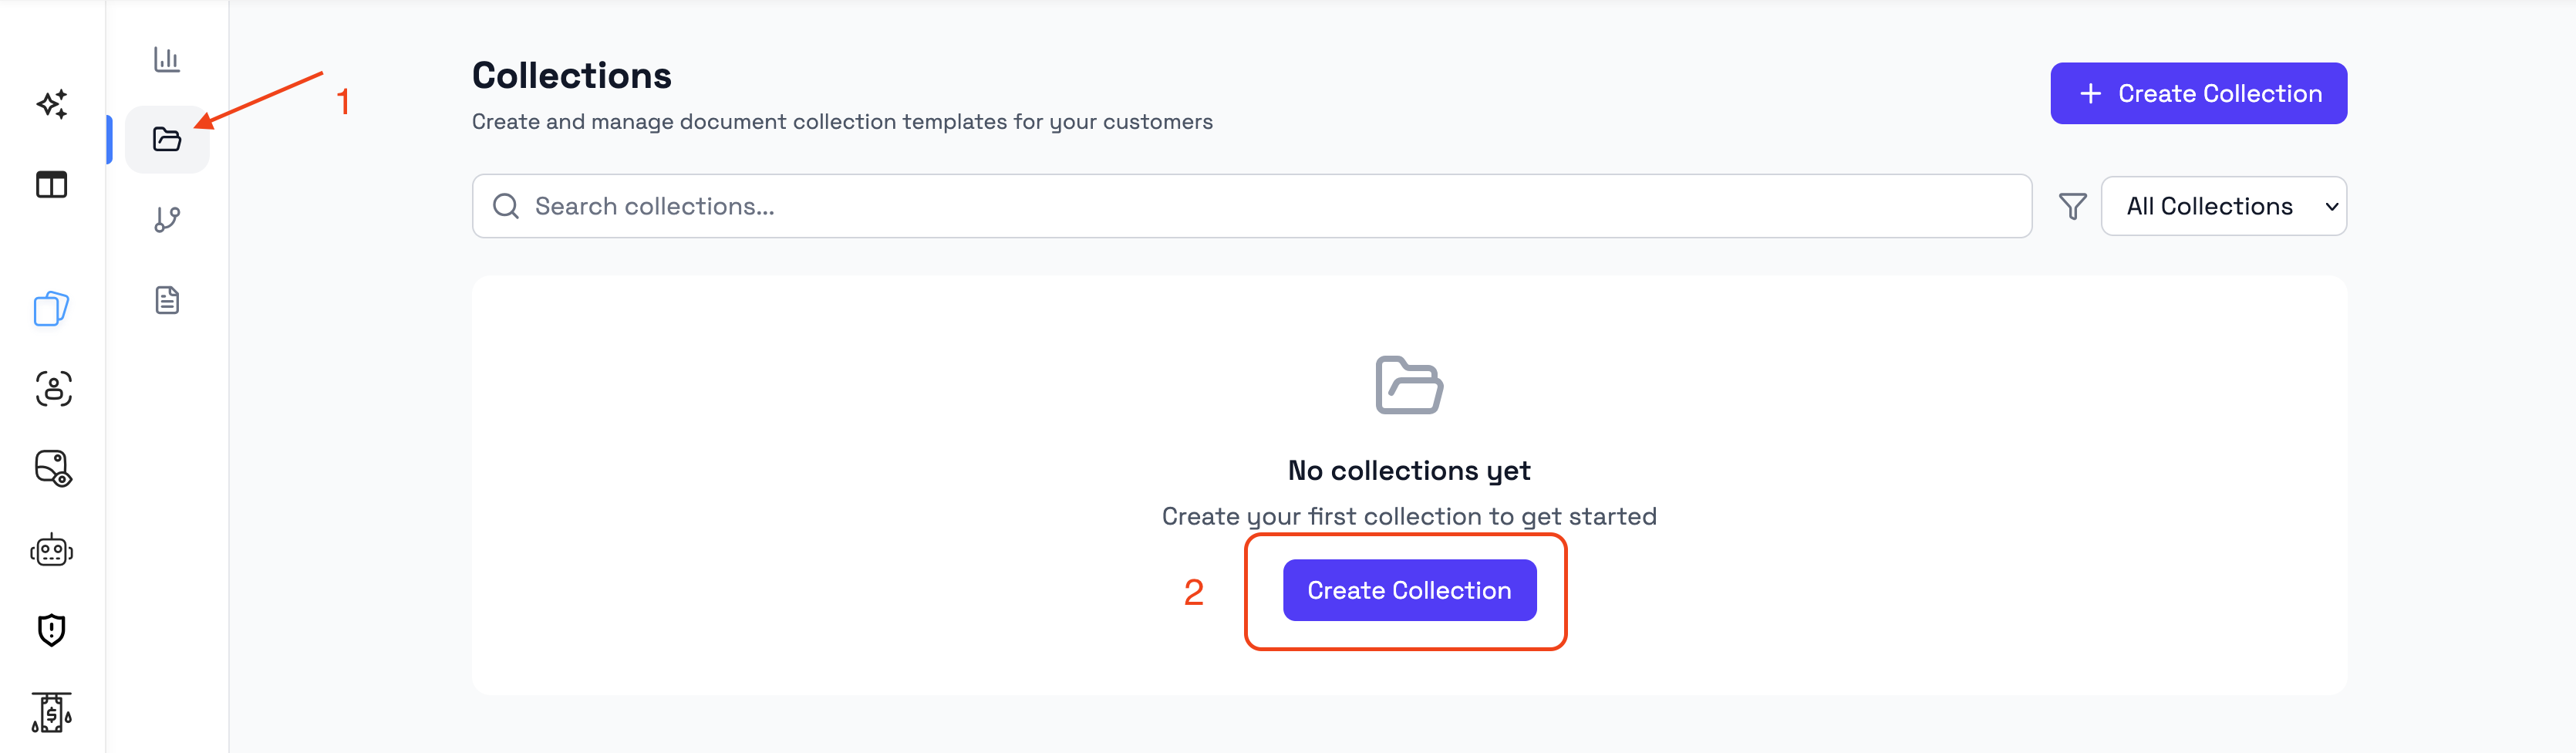
Enter:
- a Collection Name
- a Description
- a Status
A collection defines which documents you want to request from the user.
Step 2: Add your first document
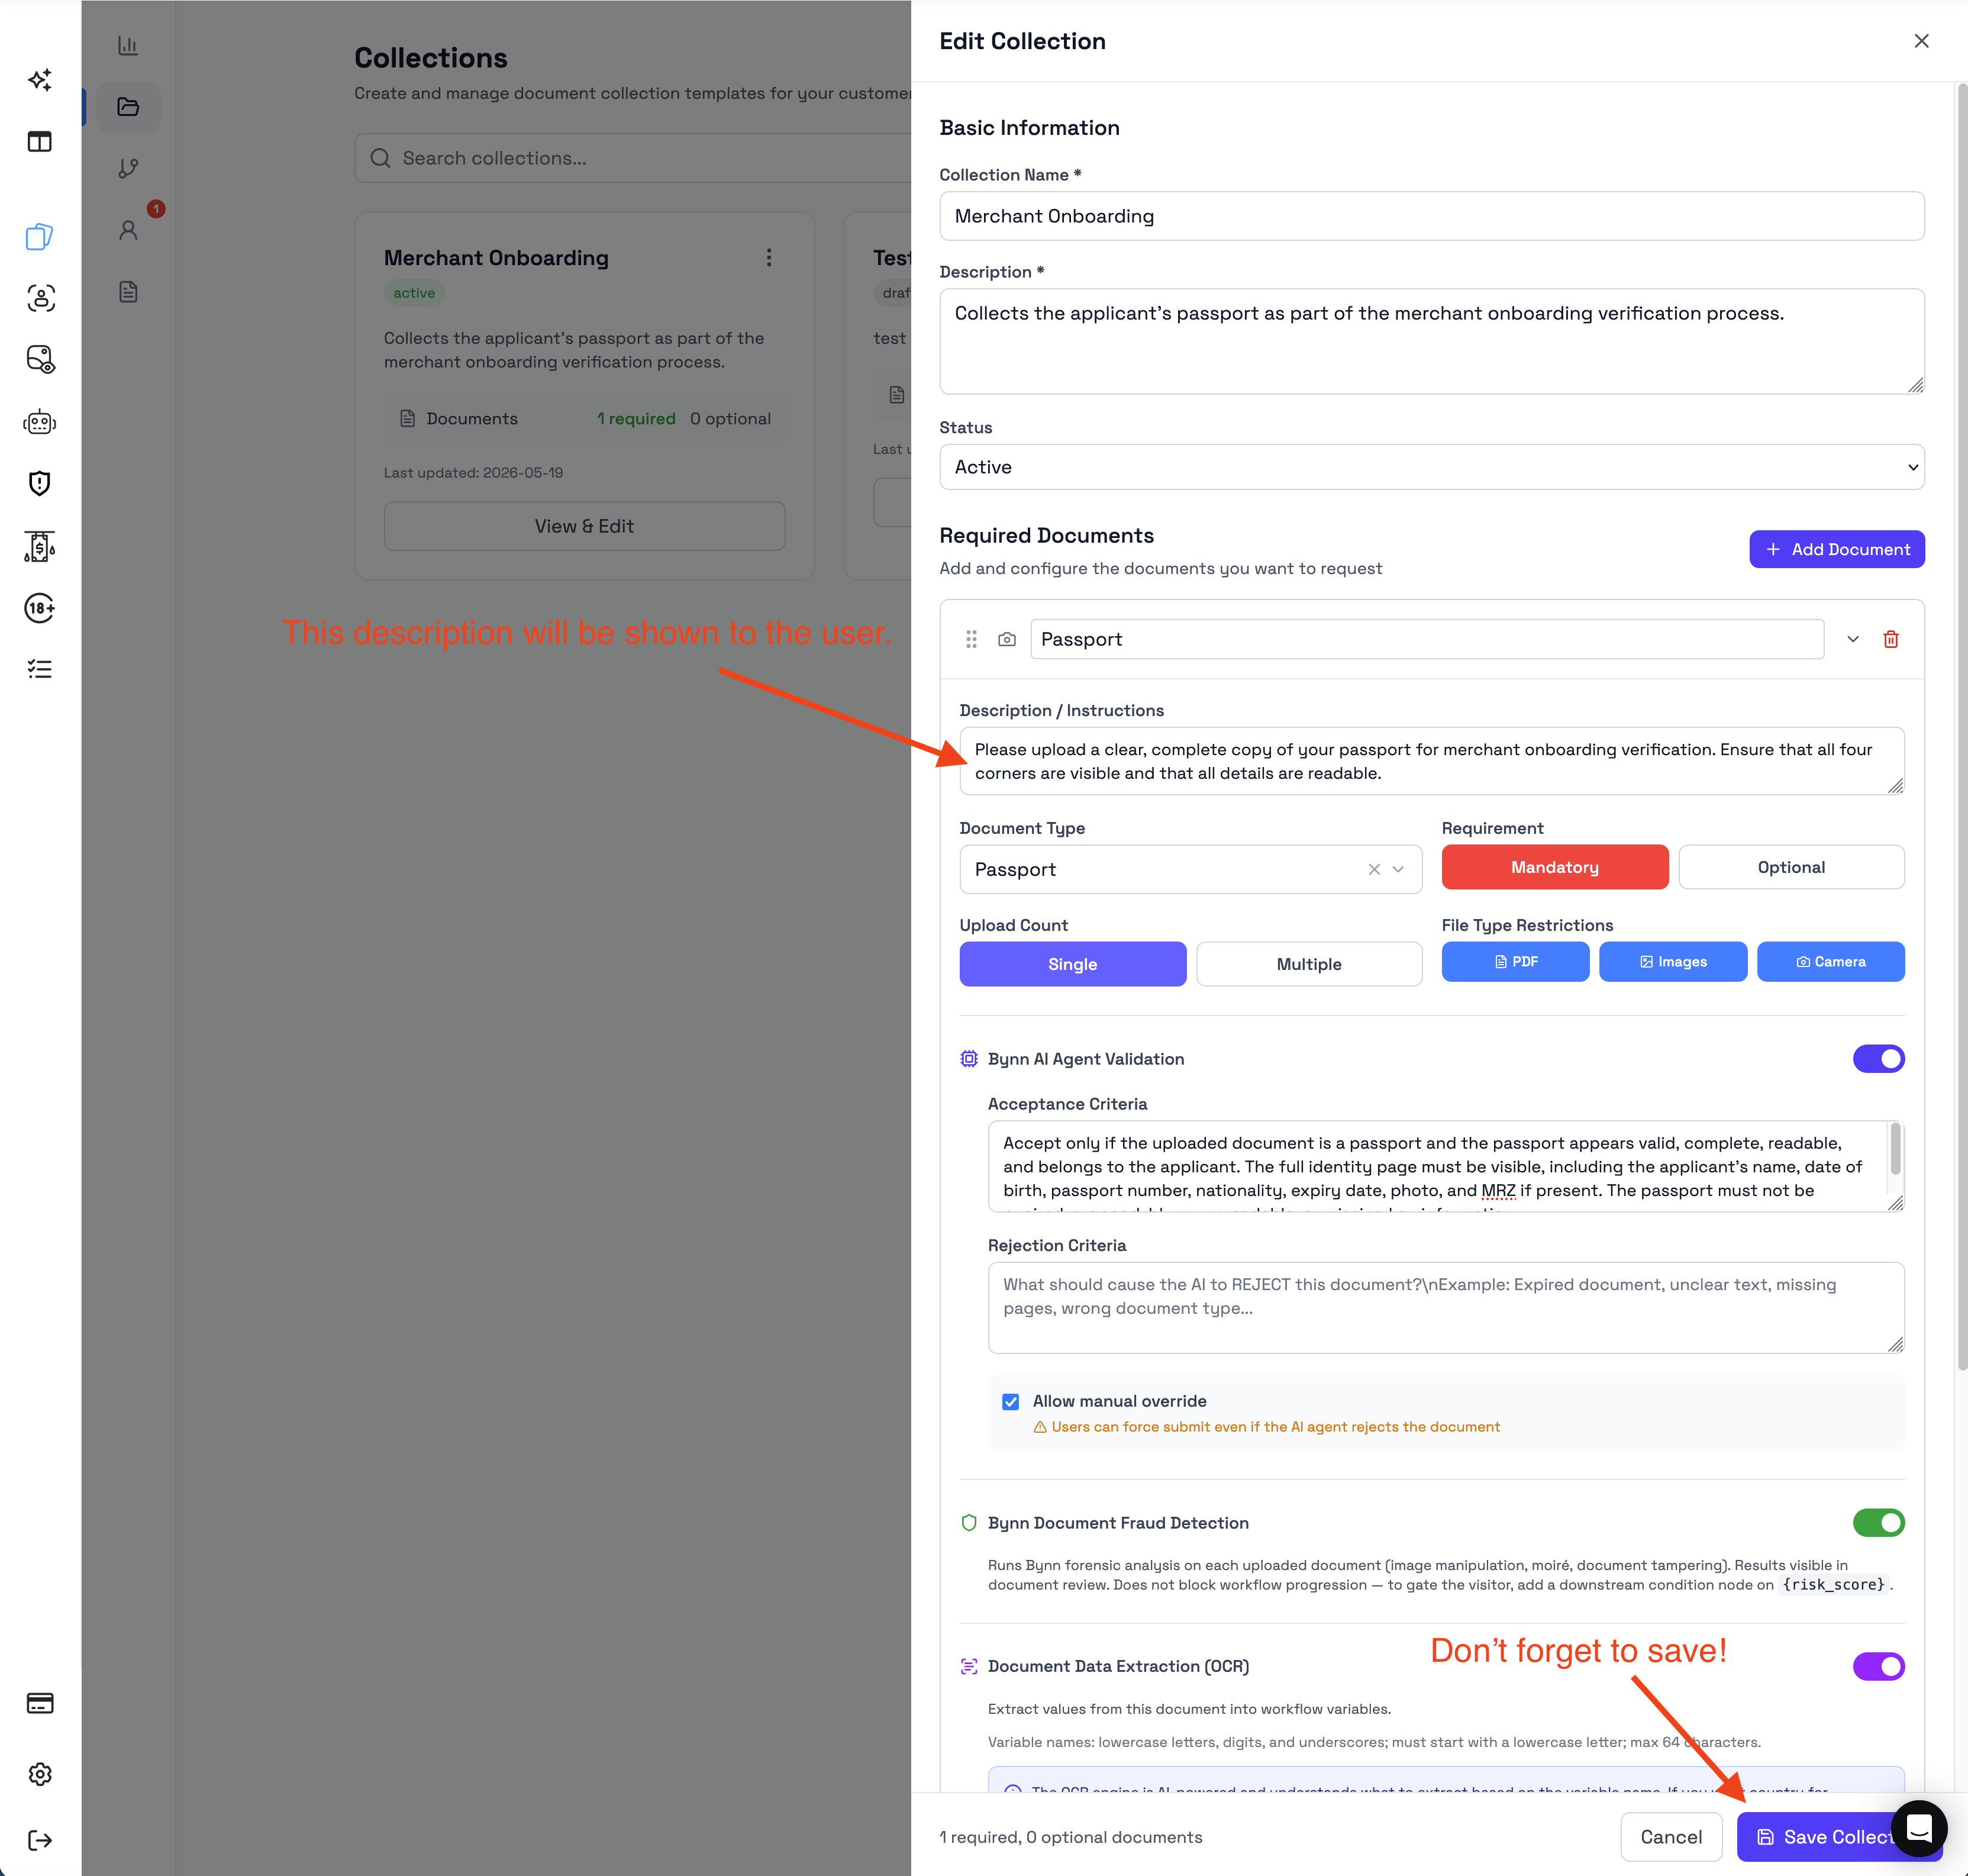
Under Required Documents, click Add Document and configure at least one document.
At minimum, select:
- document name
- document type
- requirement
- upload count
- allowed file type
If Bynn AI Agent Validation is activated. Remember to add a short Acceptance Criteria text, compatible with your test document. Read more about Bynn AI Agent Validation here: Bynn AI Agent Validation
For your first test, keep it simple and add only one required document. Please see this guide for more information about creating a collection and the options: Create a collection
Step 3: Create a workflow
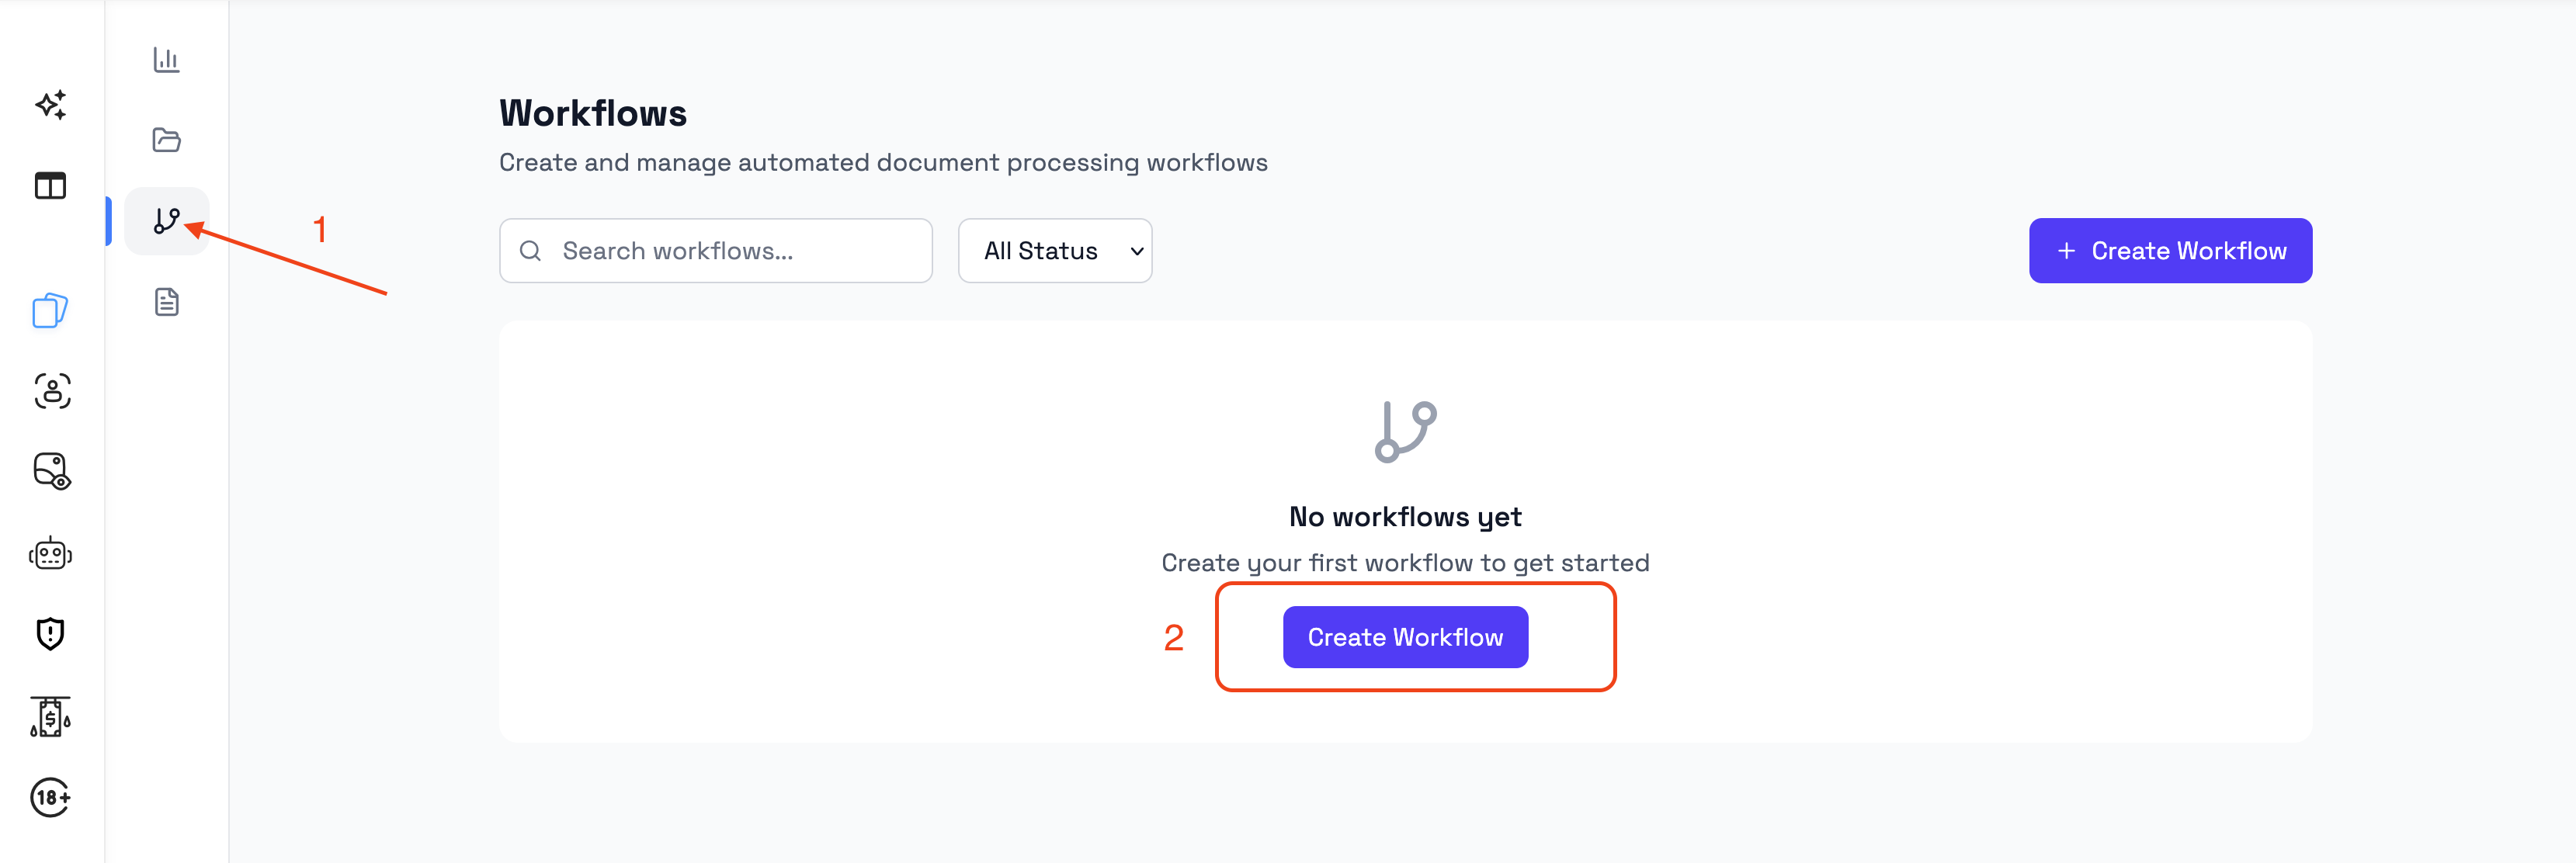
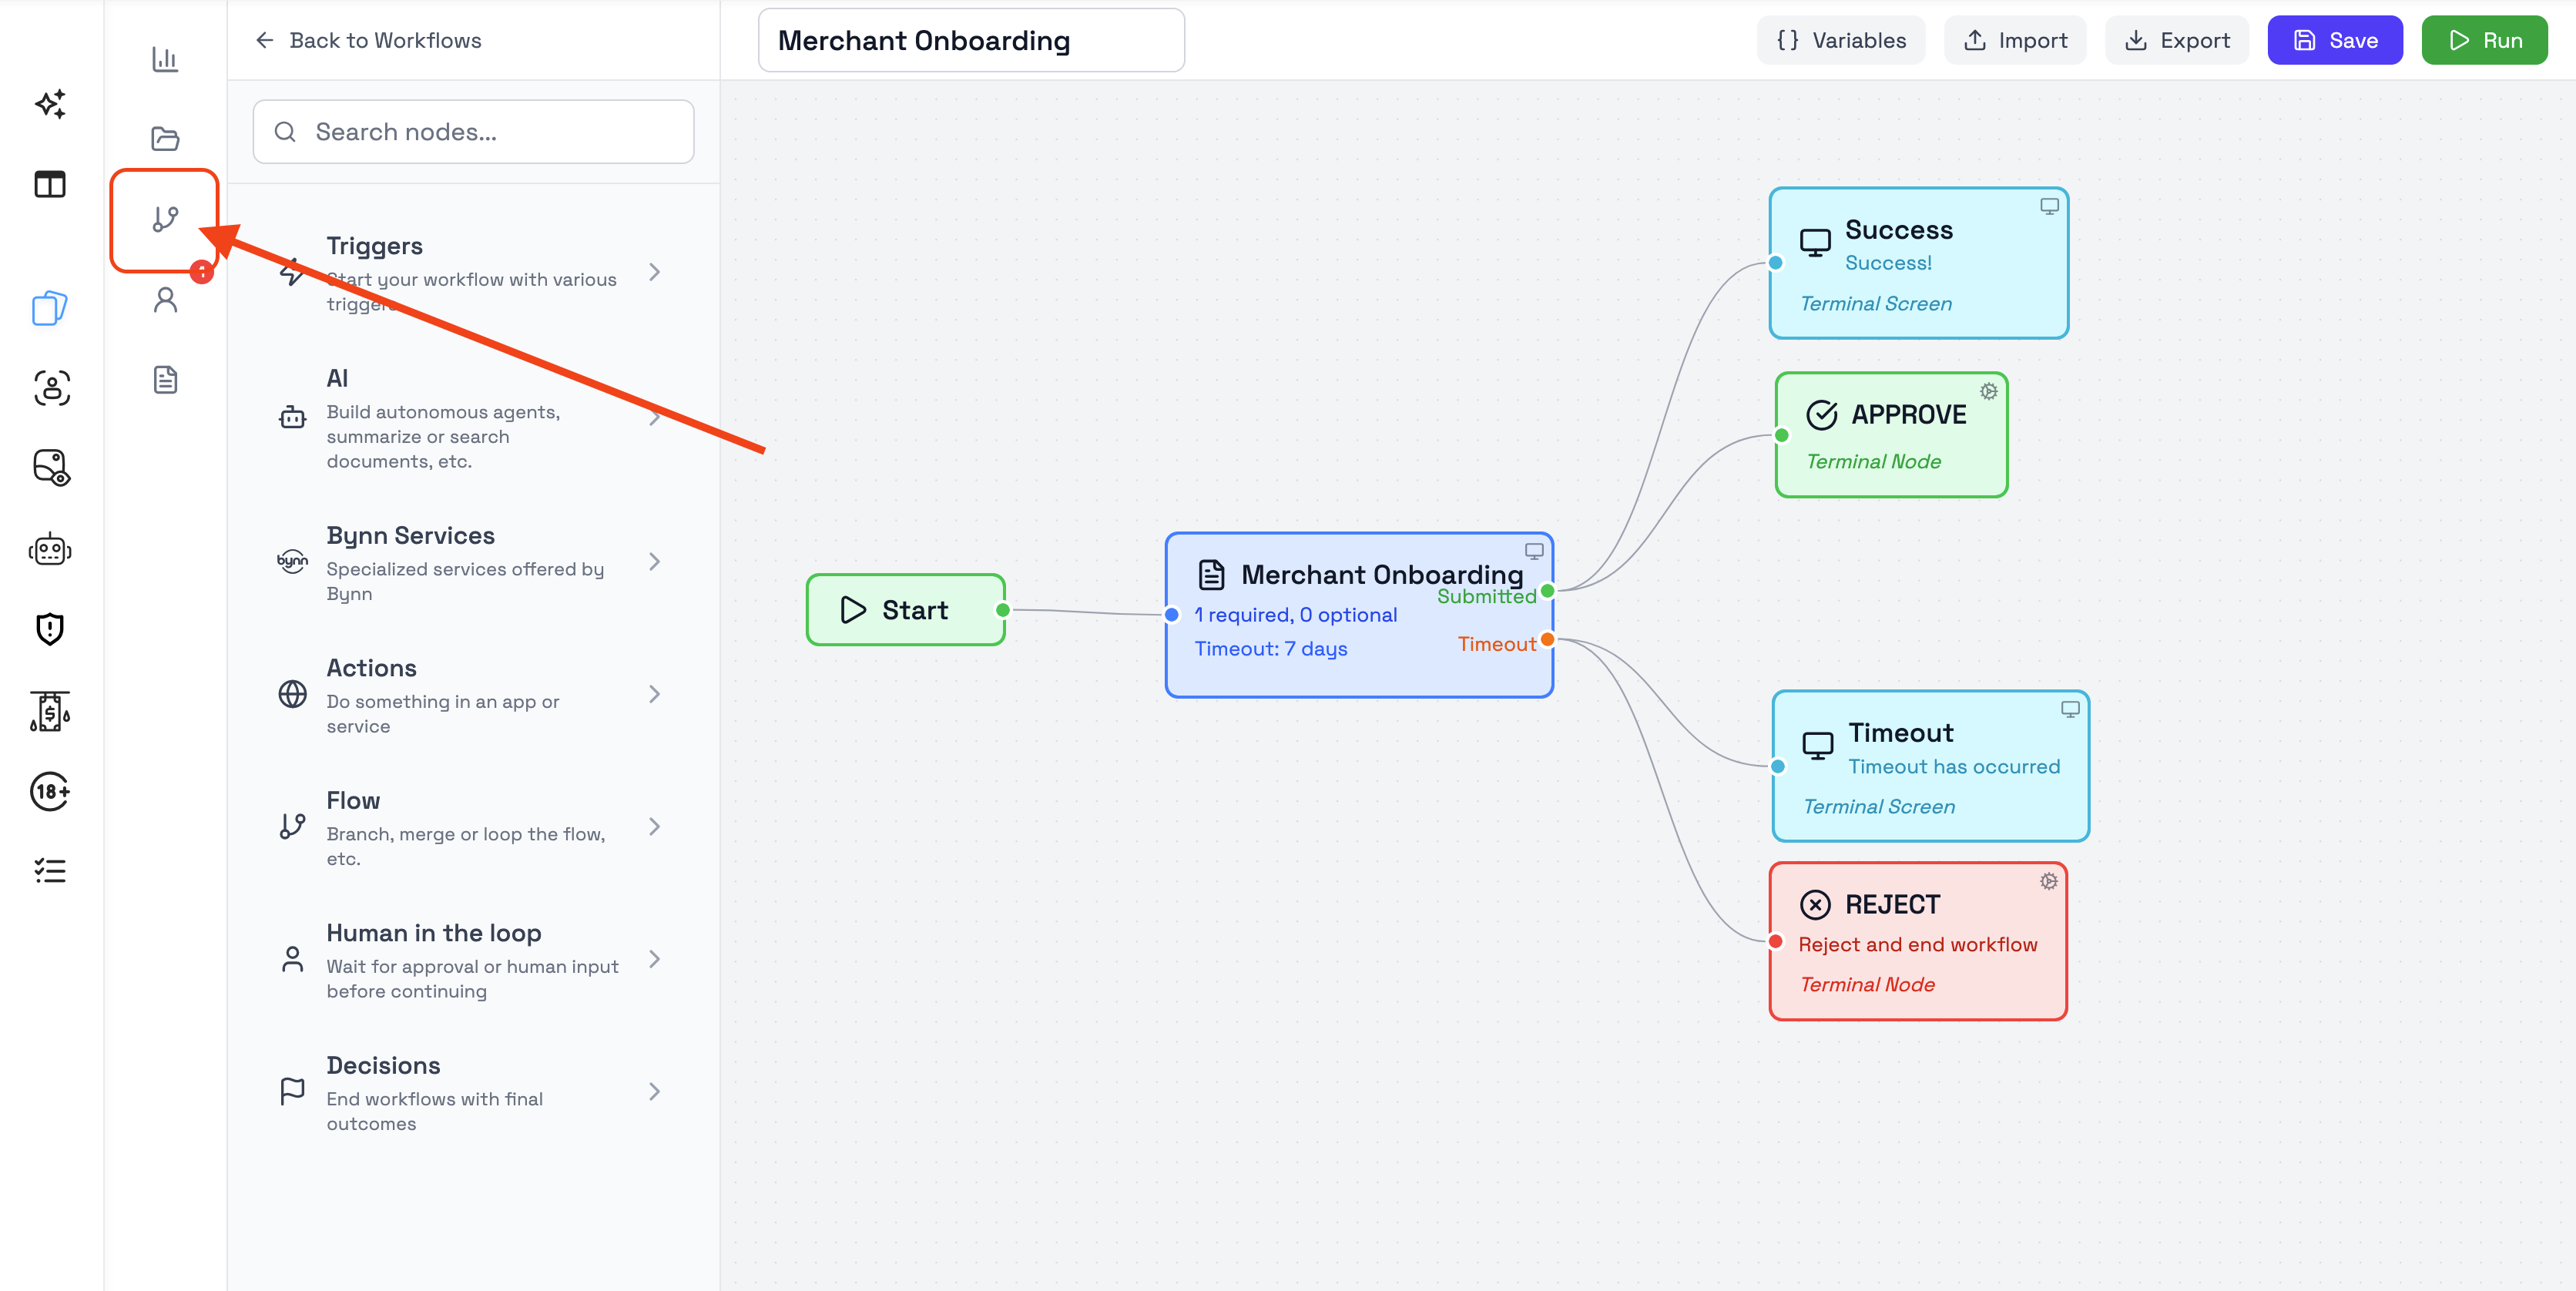
Go to Workflows and create a new workflow.
A new workflow automatically includes a Start node and a terminal outcome node, APPROVE.
For a first quick test, you only need a very simple workflow.
Step 4: Add a Document Collection node
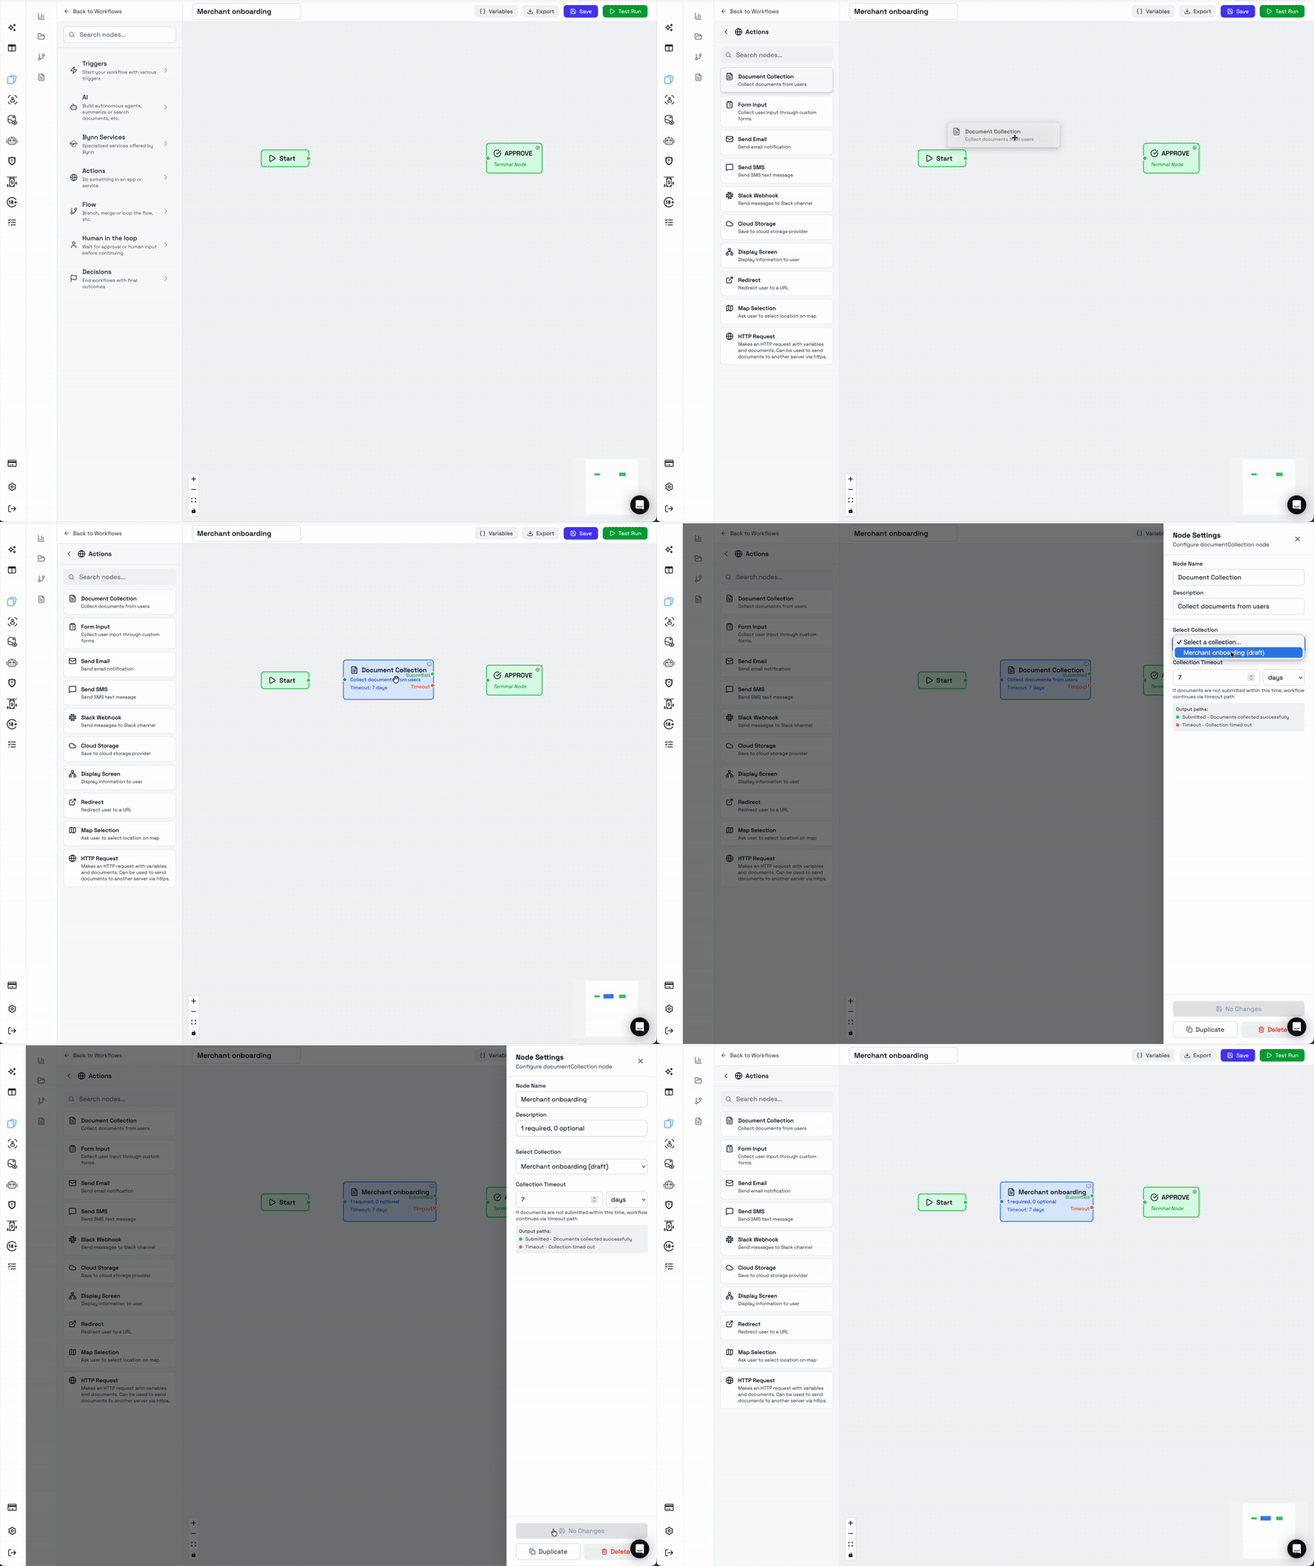
In the workflow builder, add a Document Collection node. This is found in the node section Actions → Document Collection.
This node is where the workflow requests the documents defined in your collection. Open the node settings by, click on it and choose which Document Collection you want to use.
Step 5: Add Display Screen nodes
In the workflow builder, add two Display Screen nodes. This is found in the node section Actions → Display Screen.
- Add the text you would like to display for the user.
- Disable the Continue button to make this into a terminal node.
This type of node will display a message after completing the workflow or if the workflow has timed out. Read more about Display Screen nodes here: Display Screen node
We will in this step also add a Reject node. This is found in the node sectionDecisions → Reject.
Step 6: Connect the workflow
Connect the nodes so the flow runs from:
Start → Document Collection → APPROVE / REJECT → Success display/Timeout display
This is one of the simplest possible working flows and is enough for a first test.
Step 7: Save and activate the workflow
Click Save.
Saving the workflow publishes it and makes it available for use.
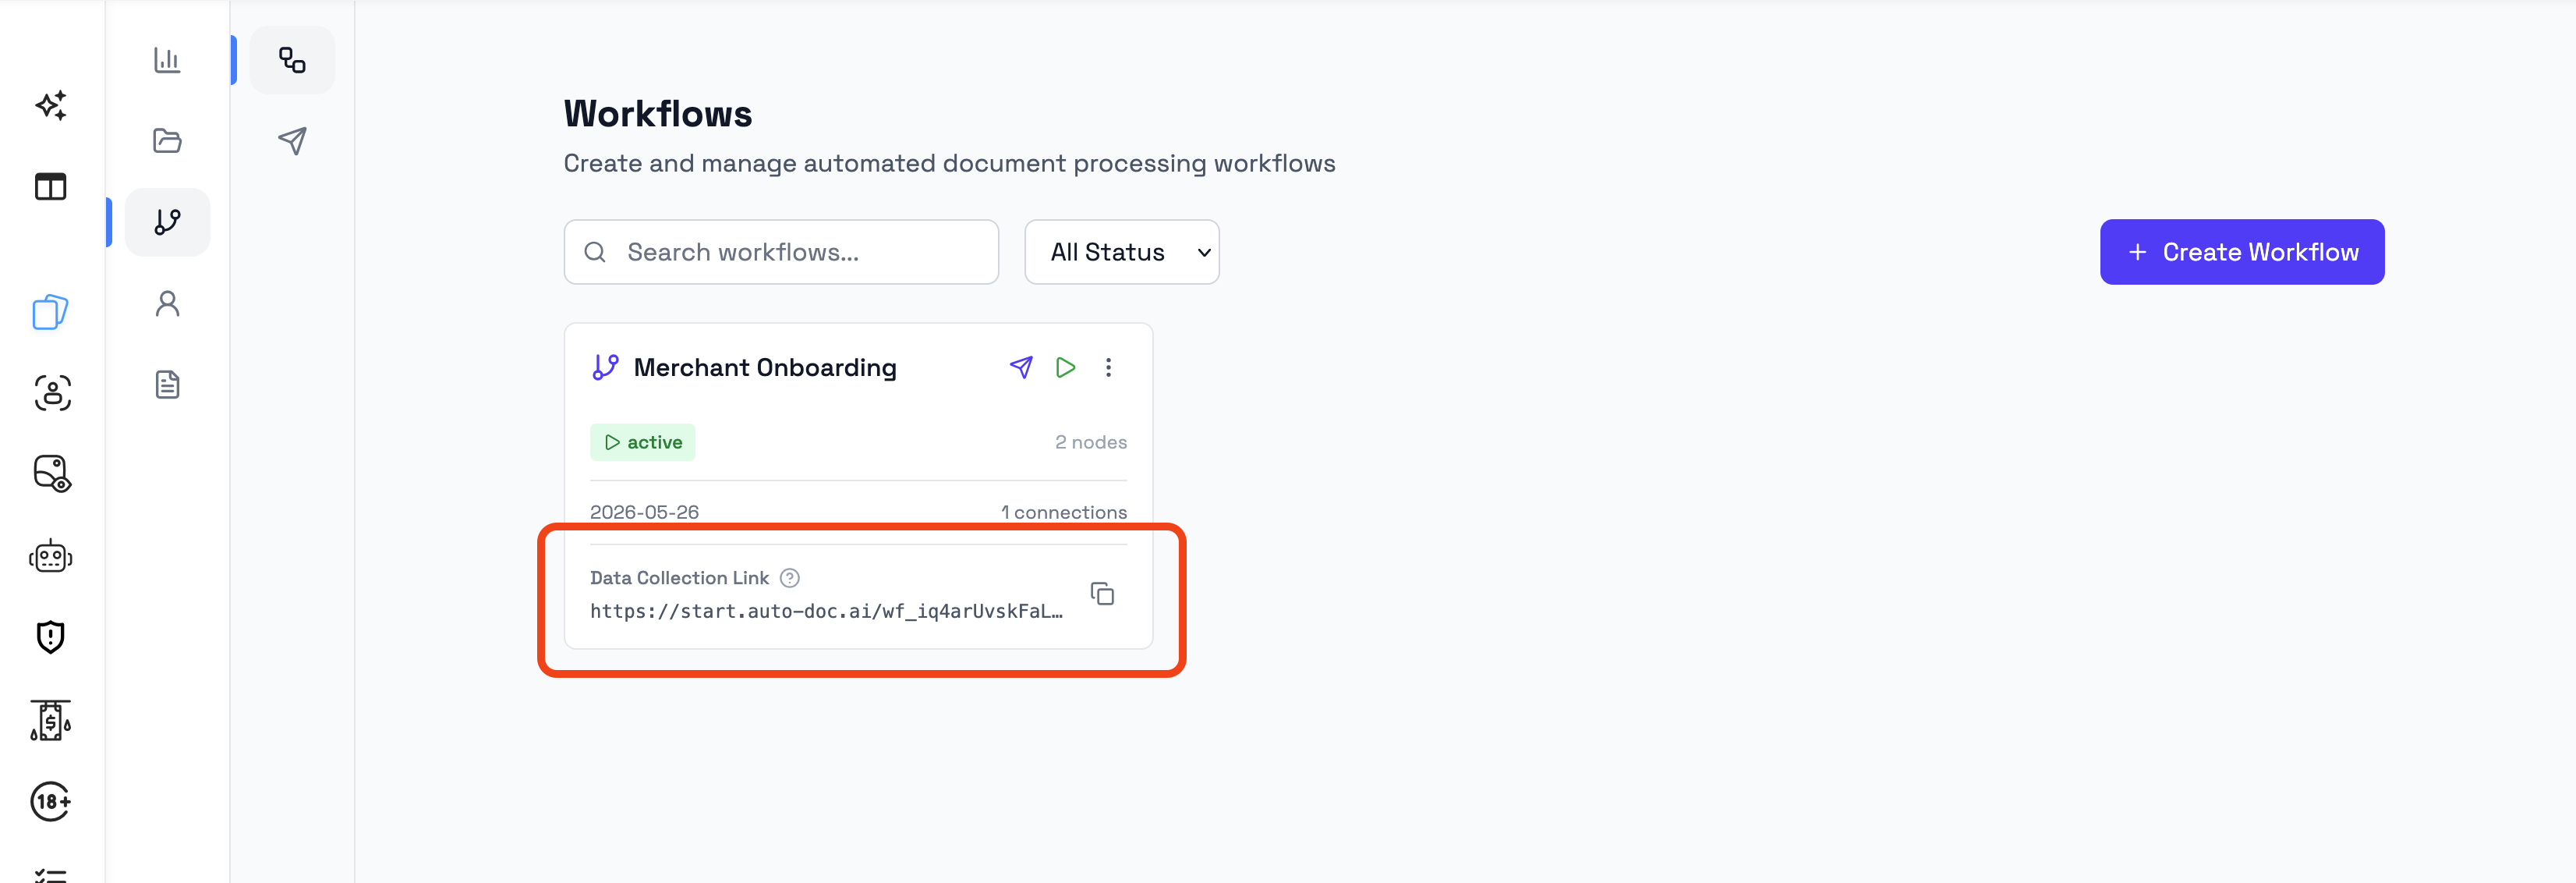
Step 8: Open the Data Collection Link
After saving, open the workflow overview and copy the Data Collection Link.
Open this link in your browser to launch the flow as an end user.
Step 9: Complete a test submission
Use the Data Collection Link to go through the workflow and upload your test document.
What the user sees during this step depends on how the workflow creator has configured the flow.
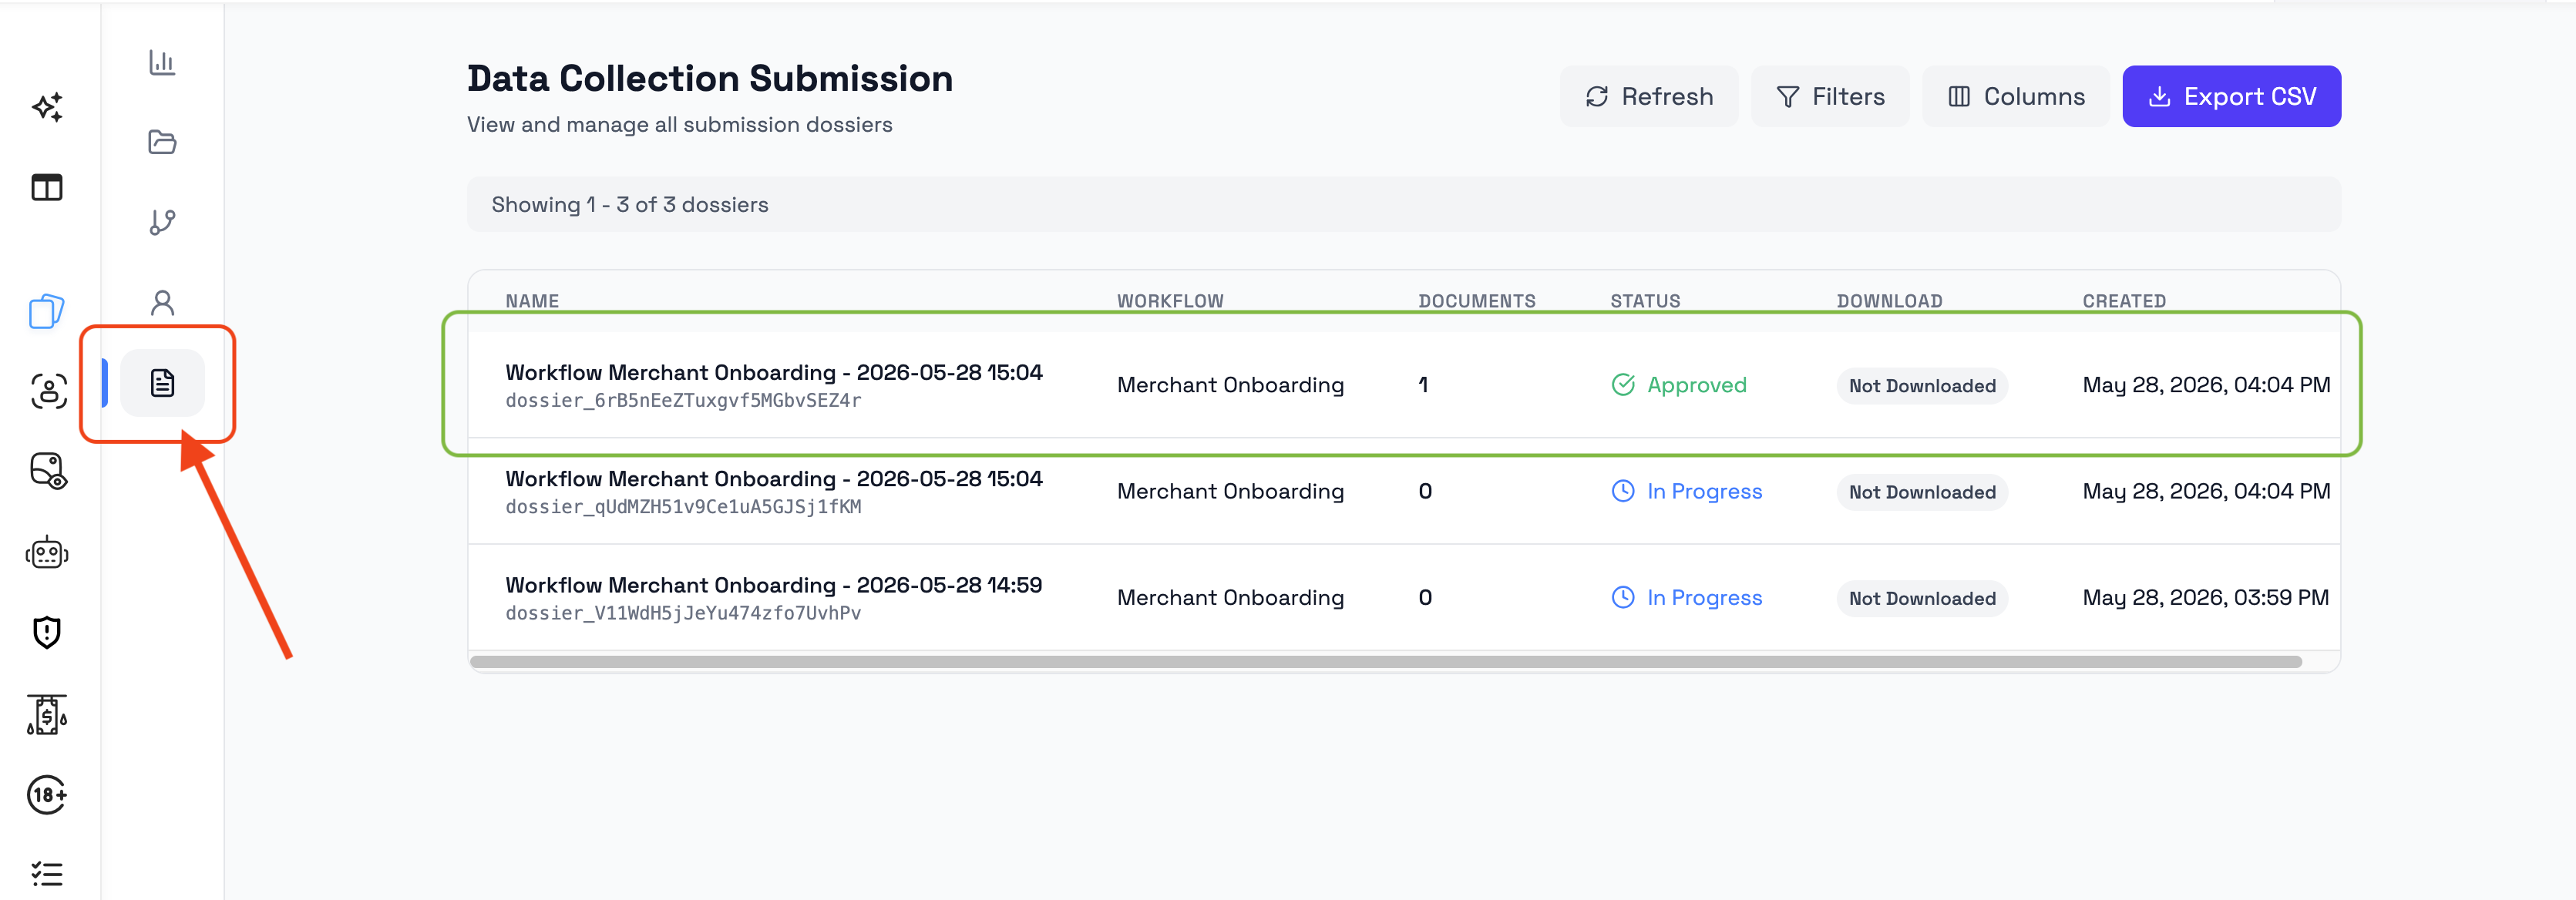
Step 10: Review the result in Submissions
After completing the flow, go to Submissions and open the created submission.
There you can review:
- completion status
- uploaded documents
- workflow name
- timestamps
- download options
If the test was successful, you should see a new submission with the uploaded document and its current or completed status.
Updated 4 months ago